Pages

Showing posts with label The Stamping Chef. Show all posts

Wednesday, 15 January 2014

Copic Skin Tone with The Stamping Chef


Good Morning, hope your all well :) 

I'm here with you today with another tutorial for The Stamping Chef

Im here to share with you another colour combination I use when colouring my skin tones - I do hope you saw my last skin tone I did - If not you can find it further below! 

For this tone I have used Copics;

E000, E00, E02

And the gorgeous 'I'm a Raver' from The Stamping Chef - Now as I wanted to concentrate on skin I have once again masked the image on my computer to just give me her head - It also meant I could make the images slightly bigger to show you :) 

So lets begin….. 

I start by laying down E000 over the entire area of the skin


Taking E00 I then come in from the outside ages - being sure not to cover the complete face, just leaving enough for a highlight…. 


You can see that I have taken the E00 over the eyelids and over most of one side of her face - this is where I think the shadow would be. 
*TIP* remember you can always add more colour later but you can't take it away so start by covering a smaller area than you want the shadow in the first place*

Taking E02 I then draw this in from the outside edge too - but once again no quite as much


You can see I have also drawn a 'flick' up to look like her nose - I know this looks very drastic on the colour side of things… it all blends :)

Taking back your E00 go back over the area as before making sure you cover all the area where you put E02


Its at this point you will see if you want the shadow to be more, remember don't add too much at once and these pens can deceive you - if your worried allow the ink a bit of time to dry - it helps! 

Going back to your E000 colorer the entire skin area as before, 


You may want to cover it with E000 and leave it a few moments to see what it looks like - you can add more in but be sure not to over saturate the paper :) And hey presto - there she is!! All coloured up! Well I hope you have enjoyed my tutorial today and I hope to be back soon with more :) 

Thanks for stopping by 

x


Monday, 25 November 2013

Copic Hair Tone

Good Morning, hope your all well :) 

A while ago I did a few tutorials on how I colour skin and hair, now due to other commitments I had to step back from the DT that I did it for, these posts have been sat on my blog for ages and so I have decided to share them with you :) 

For this tone I have used Copics;

E33, E35 and E37

And the gorgeous 'I'm a Raver' from The Stamping Chef - Now as I wanted to share a hair tone with you I am using the image I coloured the skin of last time.


I have masked the image on my computer to just give me her head - It also meant I could make the images slightly bigger to show you :) 

So lets begin….. 

I start by laying down E33 over most of the hair area


I leave the white areas where I think there may be some shine - these will get coloured in time.

Taking E35 I then come in over most of the E33


I do make sure to leave some of the areas showing of E33 as you can see.
*TIP* remember you can always add more colour later but you can't take it away so start by covering a smaller area than you want the darker area in the first place*

Taking E37 I then once again go over some of the area where I put the E35 - mainly where I think the shadow will be 


Taking back your E35 go back over the area as before making sure you cover all the area where you put E37 to blend it


Its at this point you will see if you want the shadow to be more, remember don't add too much at once and these pens can deceive you - if your worried allow the ink a bit of time to dry - it helps! 

Going back to your E33 colour the entire area to finish blending 


You may want to cover it with E33 and leave it a few moments to see what it looks like - you can add more in but be sure not to over saturate the paper :) And hey presto - there she is!! 
I finished her up using 

YG03, YG17 for her eyes
RV25, RV29 for her hair tie and top

If you have any questions just comment below and I will do my best to answer them - Well I hope you have enjoyed my tutorial today and I hope to be back soon with more :) 

Thanks for stopping by 

x


Monday, 11 November 2013

Happy Birthday Betty!!

Evening, I know an odd time for me to post…. but there is a very good reason…. 

'Happy Birthday Betty' 

Yep I think she must have thought we had all forgotten…. after all the special day was yesterday - but today there are a number of us who have got together to do a special Birthday hop!!! Now if you have come from Ruza's Blog your on the right lines… if not then hop back to the start at Corinne's blog!! I know I can't wait to see what creations everyone has made.  

Now for this hop we were very lucky that Tamara of the Stamping Chef created a wonderful image for use for our creations for Betty! Now what could she be called…. 


So back to wishing the real Queen of Halloween a Happy Birthday! We do hope you like your special image - this card is now in the hands of Royal Mail on its way to you! I do hope it arrives soon!!! I coloured the image with copics and the papers were the end of my 'Chillingsworth' 6x6 pad.  The words were all cut on the cameo!!! 

So I hope you had a fantastic Birthday and that the next few days are still full of celebrations for you! Now you need to hop along to Jackie to see what she has for you!!! 


Now if you have a  moment I would love to know what you think and ohhh the Lovely Queen of Halloween is available now in the TSC Store with 20% off so grab her while you can! 
Thanks for stopping by! 

:) 

Friday, 23 August 2013

Round is a shape!

Good Morning everyone! Hope your well!!! 

Im here today with the latest release over at The Stampin Chef - now you must remember this image is available with 20% off in the store from today - Grab her now!!!

Please allow me to introduce 
'Round is a Shape'


Now I will be honest and tell you that I really struggled with this one, I wasn't quite sure how to colour her! She was coloured using copics; 

xxxx

The papers were in my box of scraps - I just felt the colours went well! 


Well I hope you like her - I had lots of fun creating her! thanks for stopping by! Hope to see you again soon!!

And remember she is in the store right now with 20% off!!! 

Hugs

Me 

x


Thursday, 22 August 2013

Copic Skin Tutorial for The Stamping Chef

Good Morning, hope your all well :) 

Im here today with my first tutorial for The Stamping Chef - I wanted to do something but was a bit unsure as to what to do and so I'm going to share with you two things today - 

Firstly how I colour skin tones (I have done a few online lessons but nothing serious!) and Secondly a colour tone for skin that has to be one of my favourite :) 

For this tone I have used Copics;

E50, E51, E53 and E93

And the gorgeous 'I'm a Raver' from The Stamping Chef - Now as I wanted to concentrate on skin I have masked the image on my computer to just give me her head - It also meant I could make the images slightly bigger to show you :) 

So lets begin….. 

I start by laying down E50 over the entire area of the skin


Taking E51 I then come in from the outside ages - being sure not to cover the complete face, just leaving enough for a highlight…. 


You can see that I have taken the E51 over the eyelids and over most of one side of her face - this is where I think the shadow would be. 
*TIP* remember you can always add more colour later but you can't take it away so start by covering a smaller area than you want the shadow in the first place*

Taking E53 I then draw this in from the outside edge too - but once again no quite as much


You can see I have also drawn a 'flick' up to look like her nose - at this point I'm sure your thinking…. Oh no that will never blend!! Well….

Taking back your E51 go back over the area as before making sure you cover all the area where you put E53


Its at this point you will see if you want the shadow to be more, remember don't add too much at once and these pens can deceive you - if your worried allow the ink a bit of time to dry - it helps! 

Going back to your E50 colorer the entire skin area as before, 


You may want to cover it with E50 and leave it a few moments to see what it looks like - you can add more in but be sure not to over saturate the paper :) 

Taking E93 I colour her lips


Any hey presto - there she is!! All coloured up! Well I hope you have enjoyed my tutorial today and I hope to be back soon with more :) 

Thanks for stopping by 

x

Wednesday, 21 August 2013

The Vulture Knockouts vs. The Skullhead Babes Challenge

Good Morning!

I hope your here for the Roller Derby today :) This is has been so much fun!
Two amazing artists coming together head to head….

The Vulture Knockouts vs. The Skullhead Babes


Now how cool is it these two fantastic companies coming together!!  I was so excited when 'The head chef' Tamara told us of what was coming up! 2 of my favourite artists coming together like this!!

Now The Stamping Chef and Simply Betty stamps have joined forces to bring you a fantastic mini challenge - Both Tamara and Betty have designed a Roller Derby Chick for YOU to use for this challenge - NOW both images are free but you only have 24 hours to request so get in the quick!!!!
 You will see the details of each challenge below and how to claim your image!

So allow me to present to you…. 

Kitty Paw 
From 


First up - isn't she cool! I know I just LOVE her - not my normal style of 'go to' especially with her being so bright and bold but she was so much fun to colour up! 
Now TSC side of this derby is a recipe challenge - 

1 Ribbon 
2 Buttons
3 Papers (Inc BG)

The ribbon I have used is from my stash as well as the buttons - I was shocked to find two matching buttons in my stash! The papers are from 'MME Pretty Please' paper pad that came with one of my magazines ages ago - quite a sweet pack really!! I matted and layered each section with some kraft card I had stashed away, the 'You Rock' was cut on my cameo.  The image was coloured with copics; 

E000, YR20, R20, R46 B60
R21, R02
YG03, YG05, YG07
RV21, RV25, RV29
T3, T5, T7
W0, W2 
B60

I also added a dot of 'liquid pearls' to her piercing on her chin to make it stand out more!  Well I hope I may have inspired you with one side! You can request this image by sending an email to Tamara here with the subject heading of Derby

BUT WAIT!! Don't go yet….

Yes I have more to share with you!! The team at TSC were fortunate enough to have the opportunity to work with Betty's image as well… Yes so now please allow me to introduce to you…. 

From 


Now for Bettys challenge we had a colour combo to work with - you may recognise it a bit as I did try to include it in my TSC creation 


Now I have to say these colours are so not what I would normally work with - BUT it has been so much fun to try and be out of my depth!  The image was coloured with copics 

E000, E00, E02, R22
T3, T5, T7
YG03, YG05, YG07
Rv23, RV25, RV29

The papers are from my scraps and the embellishments are from my stash! This is has been so much fun playing along with these two amazing companies! 
Now you can request this image by sending an e-mail to Betty here with the subject heading as Derby!

Now remember you only have 24 hours to claim your image so get them quick! The challenges will run from Today (August 21st) through to August 28th 11:59pm - Each artist is offering a $10 gift certificate and the winners will be announced on Frida August 30th 2013.

 I hope I have inspired you to join us all and I know you will be seeing many more fantastic creations along the way!! 

Thanks for stopping by, I do hope if you have a moment you will let me know what you think! 
Hope to see you again soon 

:) 
x

Friday, 16 August 2013

PJ Party

Good morning! WOW these weeks are flying by!  

Im here this morning with the new release over at The Stamping Chef - as with every week she is available from the store with 20% off - so grab her with the discount!!! 

So please allow me to introduce to you 


Now she looks so cheeky! I just had to keep the colours soft on her - I did try something different at first but it didn't work! The image was coloured with copics;

E000, E00, E02,
R20, R22
B91, B93
E31, E33,
C0, C2
YG03, YG17
Y23, Y26, Y28

The papers are from the 'Fairy Belle' pad that I LOVE so much - I actually found the A4 one that I forgot I had :)


The flowers are from Wild orchid crafts and the other embellishments are from my stash! I would like to enter this card to the following challenges; 

Card and Scrap - Anything Goes
Just for Fun - Anything Goes
Sunshine Mail - Anything Goes
Aud Sentiments Challenge - Anything But Birthday 

Thanks of stopping by, remember you can grab her here from the store with 20% off!! Hope to see you again soon! 

x


Thursday, 15 August 2013

Lift Off

Afternoon everyone - where has the sunshine gone?  The full weather is making me want to sleep - lets hope the sunshine comes back soon!!! 

Well I have been creating slowly…. Im here to share with you today the challenge over on the Facbook Page at The Stamping Chef - we have great challenge this week using the fantastic 


You can get the image in the store now with 20% off!!! So over to my creation


I pretty much went back to basics with the image, keeping it bold colours as I thought its perfect for a little boy!  The image was coloured with copics 

(Ins Colours) 

The papers and ribbon are from my stash and the stars were cut on my cameo! 

Well I hope you like my creation! I do hope you will stop over to the TSC Recipes page and join in! hope to see you again soon :) 

x

Friday, 9 August 2013

A Bootyful Night


Good Morning everyone! Hope your well!!! 

Im here today with the latest release over at The Stampin Chef - now you must remember this image is available with 20% off in the store from today - Grab her now!!! - I just fell in love with this stunner when I saw her - Last year I really got into halloween, have loads of papers and stuff! Now all I need is a few more friends to exchange cards with! 

Please allow me to introduce 


Isn't she she just a stunner! I LOVE everything about her and can't wait to colour her again! She was coloured using copics - I think she may have to be this years Halloween image!!! 

E000, E00, E02, R42
YG03, YG17
T1, T2, T3, T4, T5, T6, T8

The web border and the words were cut on my cameo and the paper are from a beautiful SU 12x12 set! 


Well I hope you like her - I had lots of fun creating her! thanks for stopping by! Hope to see you again soon!!

And remember she is in the store right now with 20% off!!! 

Hugs

Me 

x


Tuesday, 6 August 2013

Scarlett Hunger

Evening all, yes I know a very odd time for me to be posing - but its been one of those days thats all been a bit strange - Miss N had her 'pre-school' boosters today - she didn't cry till we were home but she did make sure she told the nurse 'you hurt me' and keeps telling people she now has 'holes in her arms'.  Oh an she also has a 'pet snail' called 'Lulu' - she so should have been a boy!!! 

Anyway in-between all of todays happenings I decided to be a bit daring for the new challenge over at The Stamping Chef Facebook page!!  This week Tamara has created yet another beautiful image who is available in the store here! (If your a member of the TSC FB Page you can request her free for a few more hours!!)

And so with continuing with the strangeness of the day I got the pencils out!!  Now they haven't seen the light of day for….. well I dread to think (yes I had to dust the case!)!  But after a conversation with a 'new friend' I thought maybe I needed to challenge my-self :) So one decided to 'brave' skin tones with the 'limited' pencils - My initial attempt at colouring her skin went rather wrong… now I don't tend to share my 'glitches' but for a giggle I feel I must!! and so this is what happens when I challenge myself with limited pencils!! 


YES I colour what should be 'normal' people with a 'snake like' skin tone…. So I have concluded that I will leave the pencil skin tones for the professionals!!! 

Anyway after a bit of thinking I thought it would be a good idea to still use her clothing (As I was rather impressed with the effect I got on her clothes!) and so out came the scissors!! YES this is where I noticed 'Little Boo' is SO helpful in my life these days…. so chomp chomp snip later…..  please allow me to introduce you to 


Now I just LOVE her - for me she is a cross between 'steampunk' meets 'good girl' (no longer snake girl!) - she has the clothing of a steampunk and the face of a sweetie!  As you know her clothing was all coloured with my pencils and the added 'blending oil' her skin was coloured with copics; 

E000, E00, E02, 
R37

The papers are from my stash, none of them had any details on the bottom, the lace is also from my stash.  The flowers from Wild Orchid Crafts and the little watch charm from That Craft Place. All in all I'm rather happy with how she turned out! I would like to enter her into the following challenges; 

Scrap Creations - Anything Goes
Inky Chicks - Lovely Lace
Papertake Weekly - Anything Goes
LEJ Designs - Lovely Lace

Well I hope if you have a moment you will let me know what you think! I have to say I LOVE her! Thanks for stopping by and I hope to see you again soon :) 

Hugs

x

Sunday, 4 August 2013

Sweet Summer :)

Evening all, well I think I'm finally getting back into the swing of things, I tell you what a couple of days away really throws me out these days!!!  So I'm here to share with you today a card I had made for The Stamping Chef Facebook challenge!! The week we had the gorgeous 'Sweet Summer' available from the store here!


I decided to keep her quite simple - I think with all the heat here white has been the way forwards!  The image was coloured with copics 

E21, E51, E11, R49
T1, T2


The daisy cut round the outside was cut on my cameo and I added the little beads in the middle!  I just love the way she has turned out!  I would like to enter this card into the following challenges; 

2 Sisters - Anything Goes
Crafty Calendar - Anything Goes
Kraftyhands - Anything Goes

The image 'Sweet Summer' is now in the store! Pop over and grab her while you can!  Also remember The Stamping Chef Challenge Blog - the theme for this one is 'No Cards Allowed! Pop over and join in! Hope to see you there! 

See you again soon 

Hugs

x

Friday, 2 August 2013

Toadstool Taylor

Good Morning everyone! Hope your well!!! 

Im here today with the latest release over at The Stampin Chef - now you must remember this image is available with 20% off in the store from today - Grab her now!!! - I just fell in love with this beauty when I saw her - she kinda reminds me of Amelia a bit!  Im sure you will know why as soon as you meet her!!! 

Please allow me to introduce 


Now can you see why?!?! Yes the wings for a start - she has butterfly wings!! (Amelia sure is following in Mummys footsteps with fluttering!) and the ballet shoes!  She just makes me think of what Miss A would do all the time given half the chance!! 

I coloured the image with copics; 

E000, E00, E02,
E50, E51, E53
R20, R22
R11, R30


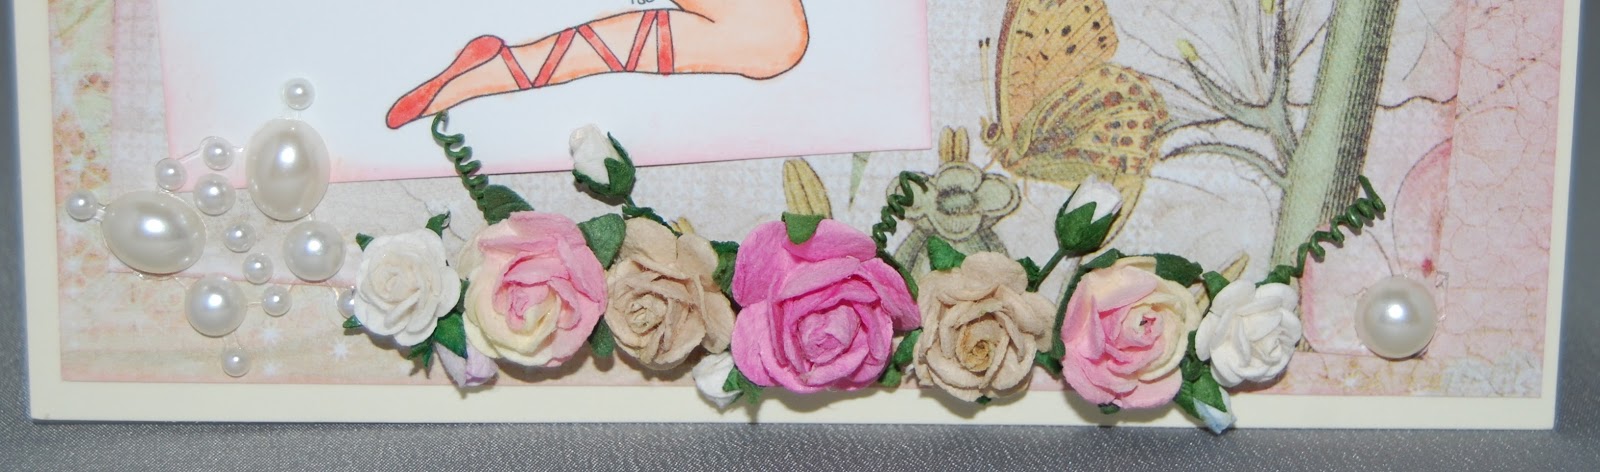
I added liquid pearls around the edge of her leotard and to the spots on her wings.   The pearl flourish is from That Craft Place - I just love the TCP line! The flowers are from Wild Orchid Crafts - I'm slowly ploughing through my stash! 


Well I hope you like my creation! I had lots of fun colouring and creating her! Remember she is available in the store with 20% off!! Also why not stop by at The Stamping Chef challenge blog??  fantastic theme for this challenge 'No Cards Allowed' - why not pop over any join in! 

Thanks for stopping by, I do hope if you have a moment you will let me know what you think! Do hope to see you again soon :) 

Hugs 

Me

x 


Friday, 26 July 2013

Life is a Cabaret

Good Morning and welcome to my first official post as a 'Sous Chef'.  I have to say I'm loving every moment of the team, the girls are fantastic and the images… well they are just wonderful!!!

So I'm here today with my first (of hopefully many!) Friday release -
please let me introduce you to…...

Life is a Cabaret


Isn't she just a STUNNER! I love everything about this girl! I have to be honest and say she stumped me at first, but then I came up with the wonderful idea of an easel card…. the first time in ages that I have made one!!! The image was coloured with copics

E000, E00 E02
R35, R37
T2, T4, T6, 

Now it was then how to fill the 'blank' and so I decided to make it my sisters birthday card - she is a dance teacher - for ballet, tap and modern - but this year I decided she needed something a bit more 'mature'! the plaque on the left says;

Performing Tonight
28.10.2013
Miss Kathryn!!!

 Well I hope you like her and you will pop over to The Stamping Chef this image at the moment has 20% off in the store so grab her NOW!!! to see what the rest of the new release team have come up with! Hope to see you again soon :) 

Hugs

x

Thursday, 25 July 2013

Surfs Up

Afternoon all, well thats about typical… kids break up for school holidays and it rains on the first day :( and to top it off - I don't have a car today :( lets hope these kids behave and that I may get to craft at some point :) So I'm here today with a new card I have made for The Stamping Chef Facebook Page :)

The wonderful Tamara has given us the opportunity to work with yet another fantastic image she has drawn!  Please let me introduce to you

'Surfs Up'


She is just perfect with the weather we have been having - oh how I wish I could learn to surf - But I don't like water in my face!?  Anyway I decided that it was about time 'Little Boo' did some proper work - incase you don't know 'Little Boo' is what I have called my lovely cameo!


I used the lovely stepper card template from the Sil store as my base, I wanted something that would make her stand out!  When I cut the file I then re-sized it slightly to get the matting lad layering effect.  The surfboard is also from the Sil Store.  - I cut that on white card and coloured the flowers with my copics to match the pink on her surf board.


The image was coloured with copics

E21, E11, E51
B95, R24, R27
YG03, YG17,
RV13, RV15, RV18
T2

The paper is from my stash - it didn't have a name on it - so not sure who its by! The sentiment of 'This is my happy place' is also cut on the cameo and from the Sil store - oh yes 'Little Boo' had quite the work out last night! I added the charm on the left side just to finish her off!   Well I hope you like her! Remember you can get this fantastic image from the store here!

I would like to enter this card into the following challenges;

Crafts and Me - Anything Goes
Inklings and Yarns - Anything Goes
Nutcrafters - Summer Sunshine Fun
Scrappers Delights - Inspired by a Song - Surfin' U.S.A by the Beech Boys

Thanks for stopping by, if you have a moment I would love to know what you think of her! Hope to see you again soon :)

x


09 10